
Appointment Next Steps Screen
Completing the Appointment
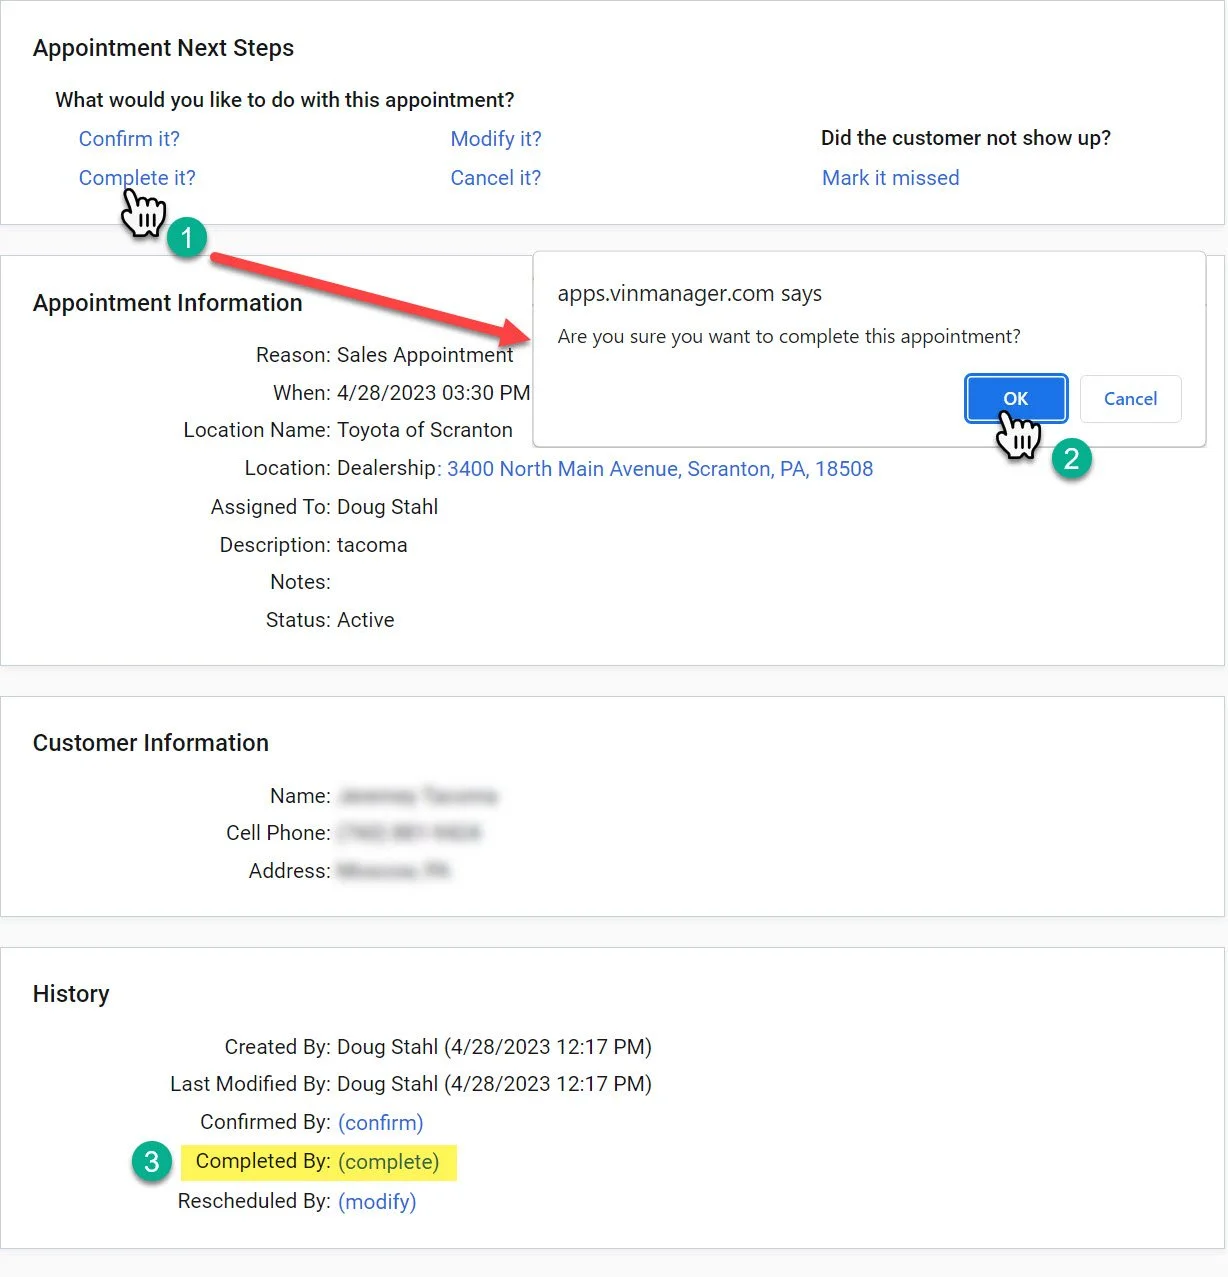
1- Click the “Complete it?” button.
2- A pop-up will show up on the screen asking you to confirm the action. Click the “OK” button.
3- After you press the okay button, “Completed By:” section at the bottom will appear with a timestamp and the name of the user that completed the appointment.
If the appointment is scheduled as a dealership appointment. This will start a showroom visit.
Confirming the Appointment
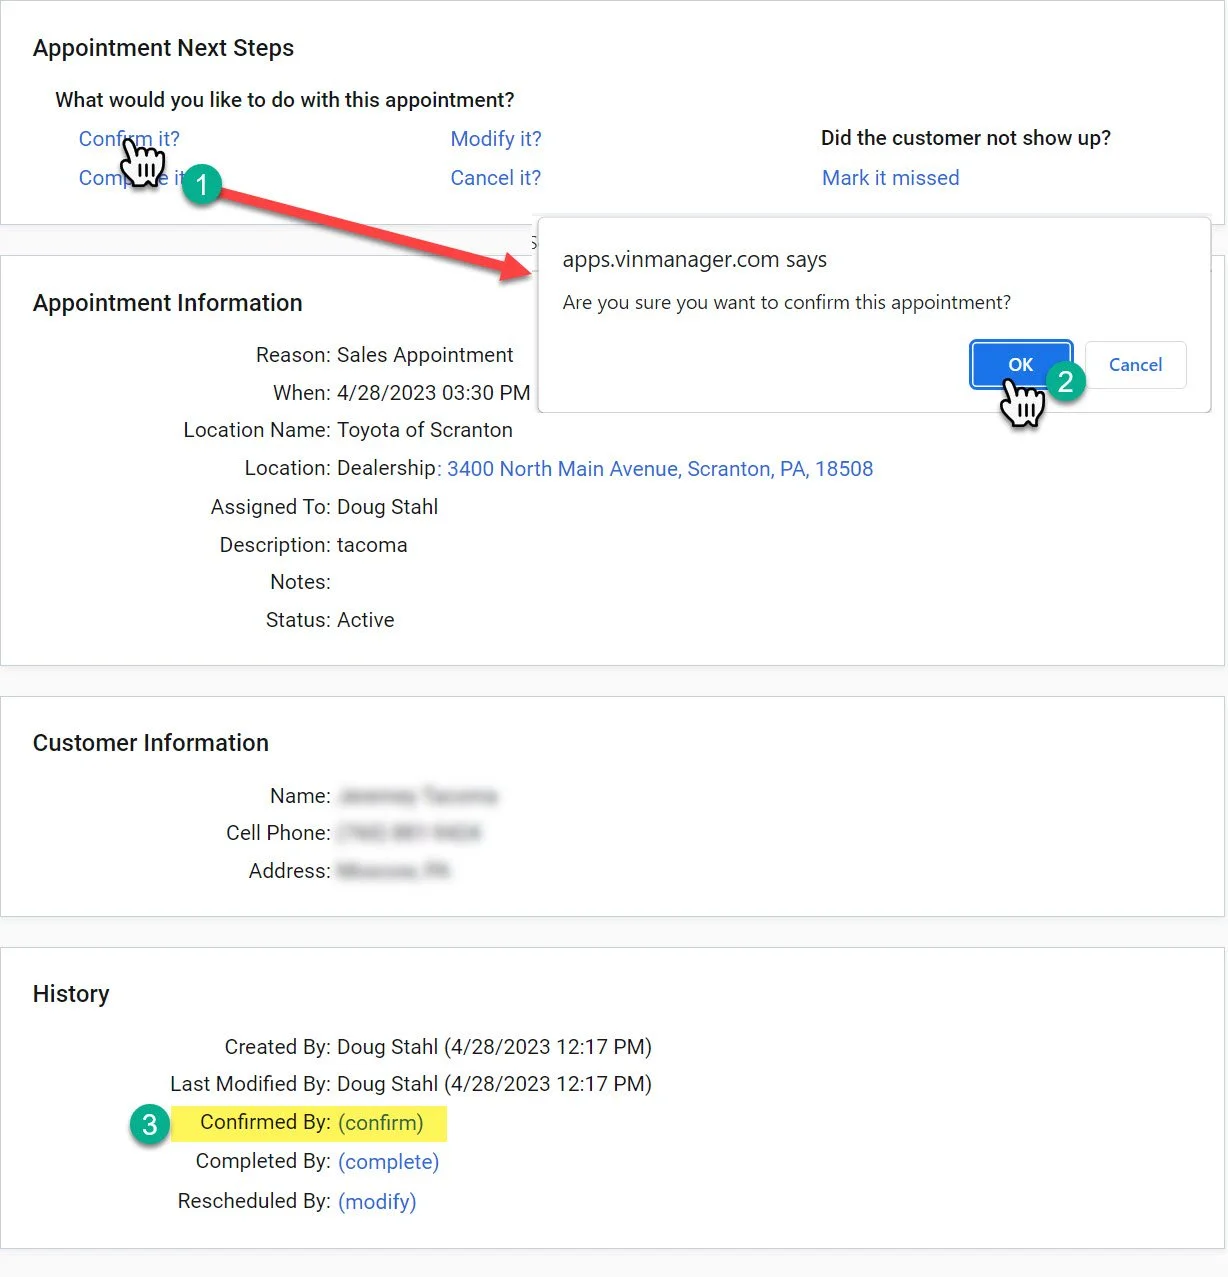
1- Click the “Confirm it?” button.
2- A pop-up will show up on the screen asking you to confirm the action. Click the “OK” button.
3- After you press the okay button, “Confirmed By:” section at the bottom will appear with a timestamp and the name of the user that confirmed the appointment.
Canceling the Appointment
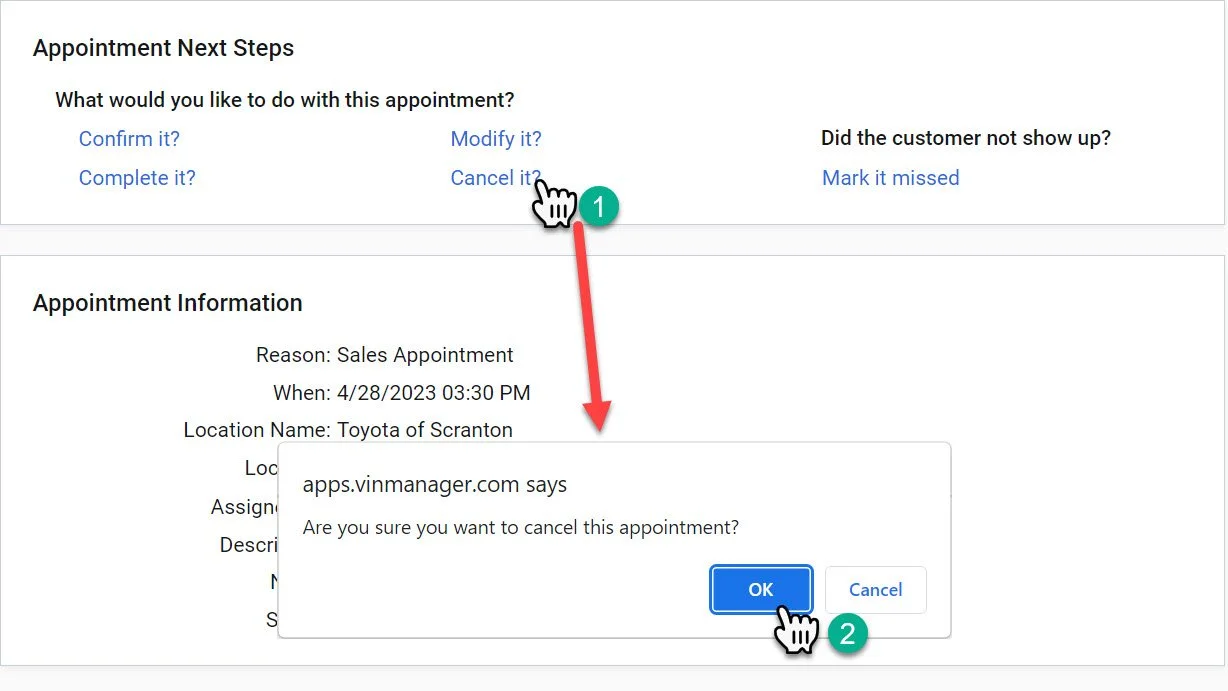
1- Click the “Cancel it?” button.
2- A pop-up will show up on the screen asking you to confirm the action. Click the “OK” button.
Cancelling the appointment is only used when an appointment should not have been made in the first place.
This deletes the appointment from the system with the exception of a timestamp on the customer record. If the customer did not show or has informed you they will not be coming and it was an appointment, mark the appointment “missed”.
Marking the Appointment Missed
1- Click the “Mark it missed” link.
It will almost appear as nothing has happened when you click the link. The screen will flash and update the appointment.
Marking the appointment missed is important when a customer does not show.
This categorizes the appointments in the appointment log and makes it easier to follow up correctly.


2- This is the vehicle of interest.
3- There are a few “Reasons” for appointments: Sales Appointment, Delivery, Appraisal, and Other. At our dealership, we only use the “Sales Appointment” reason.
4- In this section, you can adjust who the responsible sales representative is for the appointment.
5- This is where you can open the calendar and adjust the date.
6- The start time is the most important part of the time frame process, this is how it will show on the appointment log and the Dealership Dashboard.
7- The end time will effect the disposition on the Dealership Dashboard. But generally, there is no need to adjust this.
8- Generally, the description will be typed out as “Appointment Set”, but other than this screen and the customer profile, you will not see this description.
9- Notes. Do not use this section. If you have notes that you would like to include in regards to the customer’s appointment. Please attach them to the customer profile for visibility.
10- The location will default to the dealership, but you can also signify a virtual appointment, or log the customer’s address for an at home visit.
11- Using the view on google maps button, is a good way to enter the customer’s address in and provide turn by turn directions to the dealership
12- This would exit the appointment modifying screen without any changes taking place.
13- Any of the adjustments made above must be saved after they have been made prior to navigating away from this page for them to take effect.
Modifying the Appointment
1- Click the “Modify it?” link.
This will adjust the screen to open to the appointment screen.
Modifying the appointment should be reserved for updating information if you made a mistake when setting the appointment, if a future appointment needs to be rescheduled, or if the customer is adjusting an appointment time for the same day.
If the customer cancels and reschedules the appointment for another day, mark the appointment missed (not cancelled) and create a new appointment.