
Creating An Appointment
Xtime
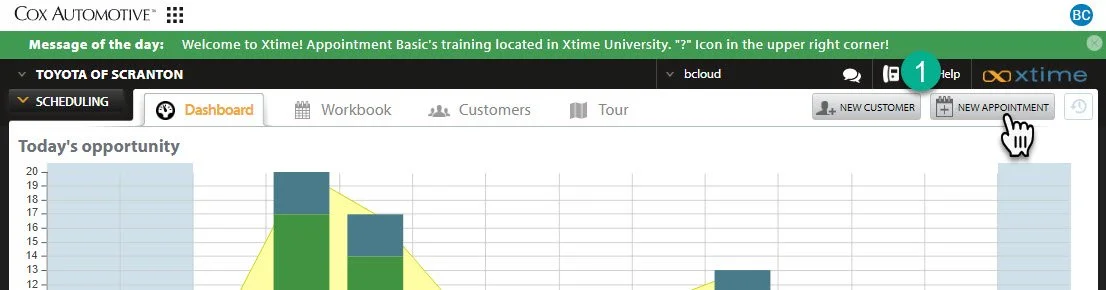
1- Select the new appointment button. Shown above is the workbook, but this button or link is available in various forms throughout the system.
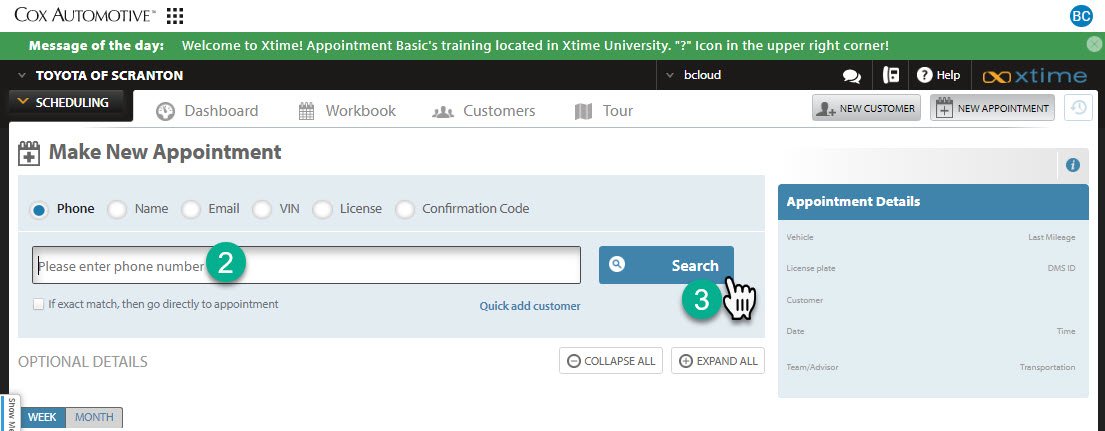
2- Place the customer information you have into the search bar.
You must search for a customer prior to setting an appointment.
3- Click “Search” or press enter.
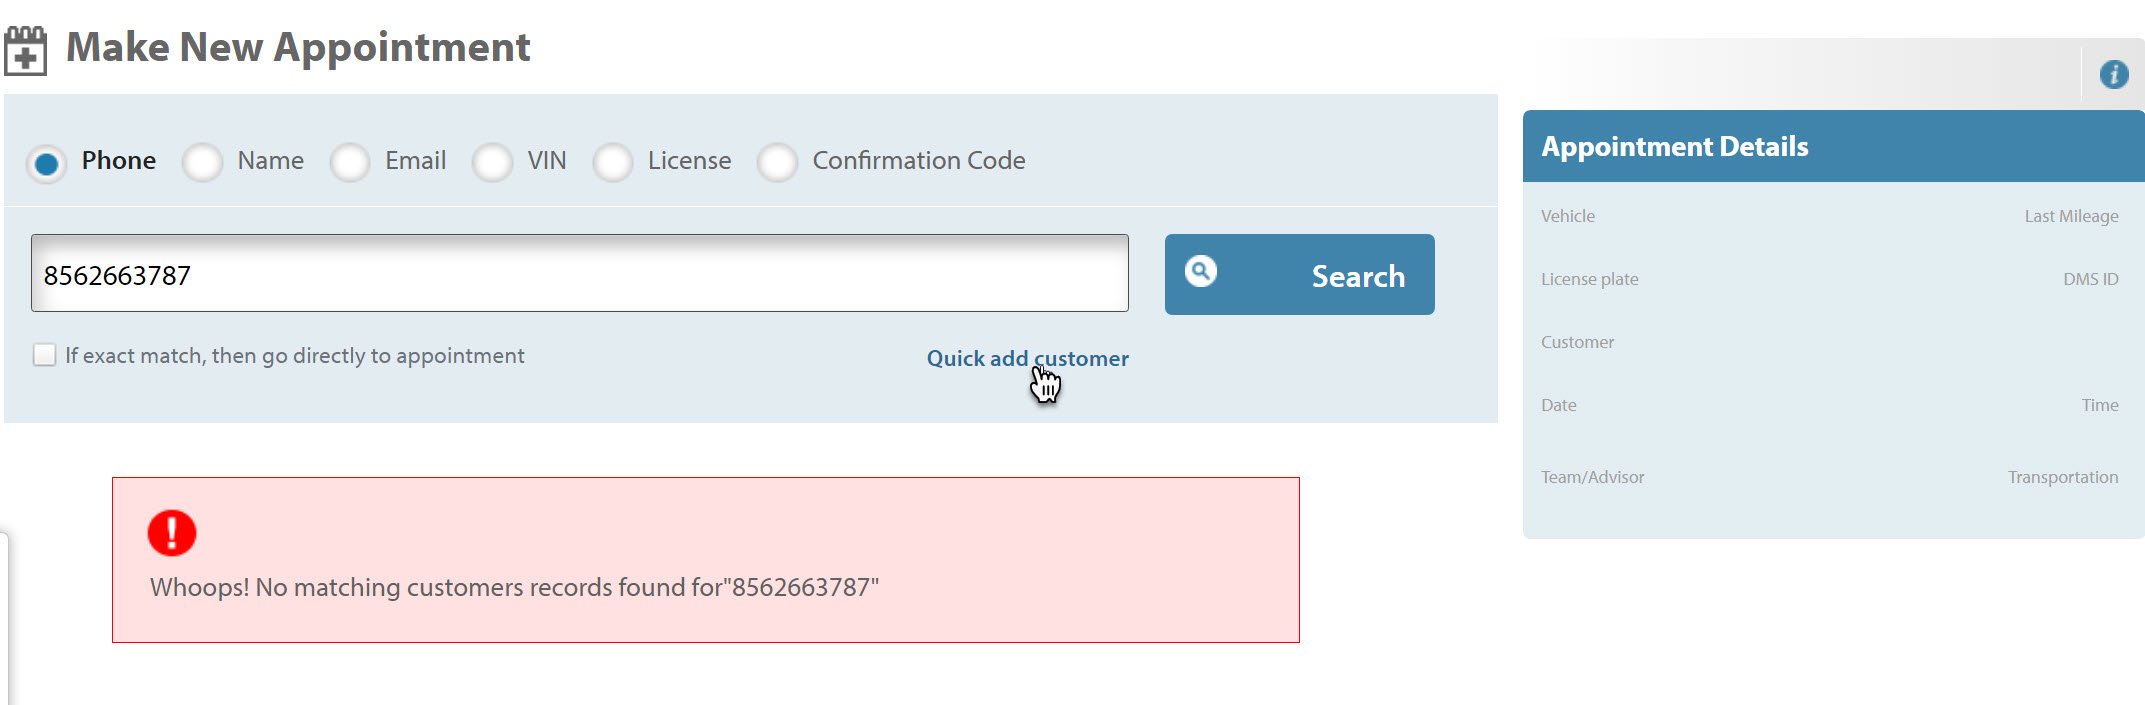
If the customer does not appear in the search, you will need to add them.
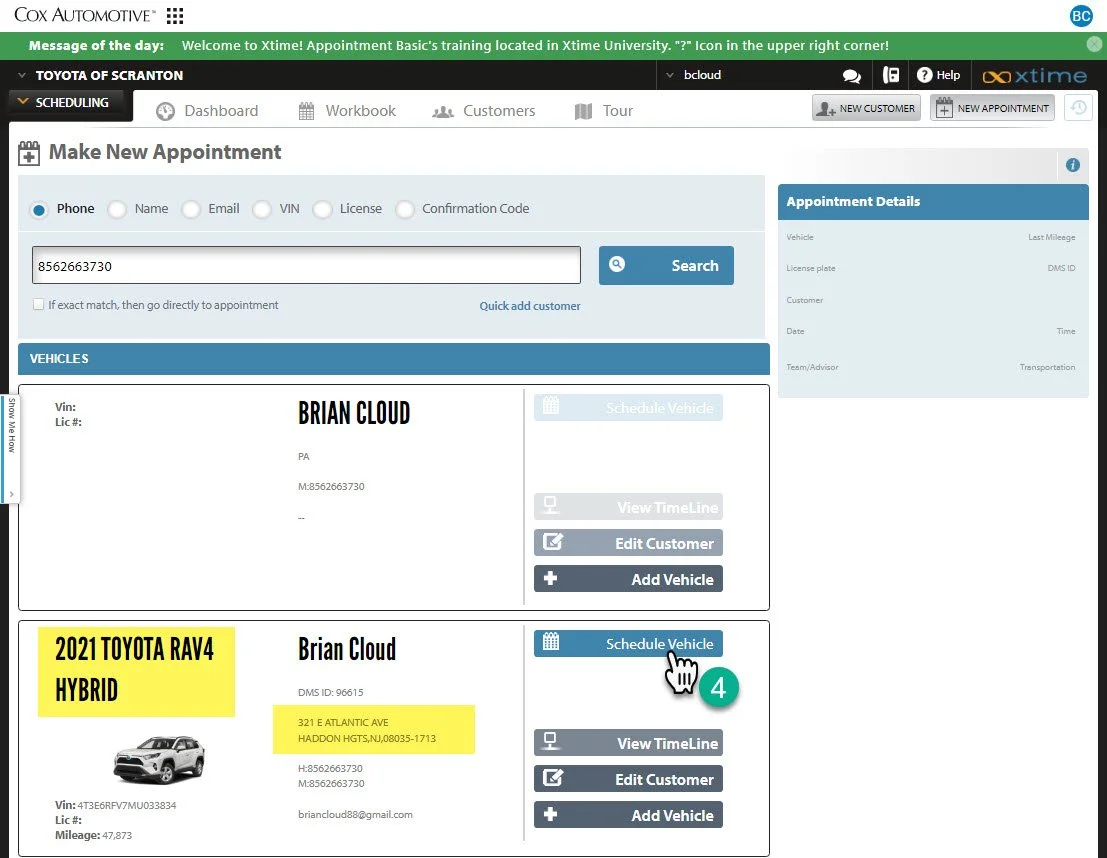
4- Choose the right vehicle by confirming the vehicle and the customer’s address, and click “Schedule Vehicle”
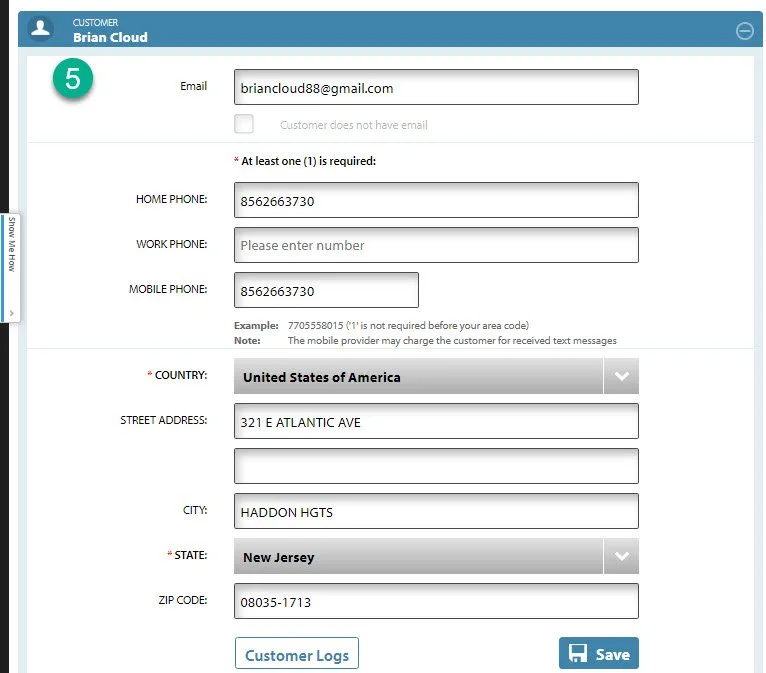
5- Continue to confirm the customer’s information. Including confirmation of cell phone number and email.
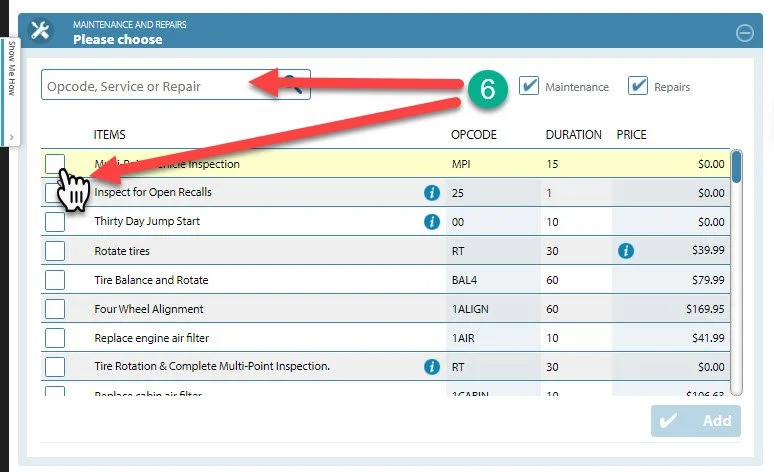
6- Choose a service by typing it in the service search bar and clicking the check box below. Click “Add” when you have completed choosing the requested services.
** Do not provide the prices listed next to the service **
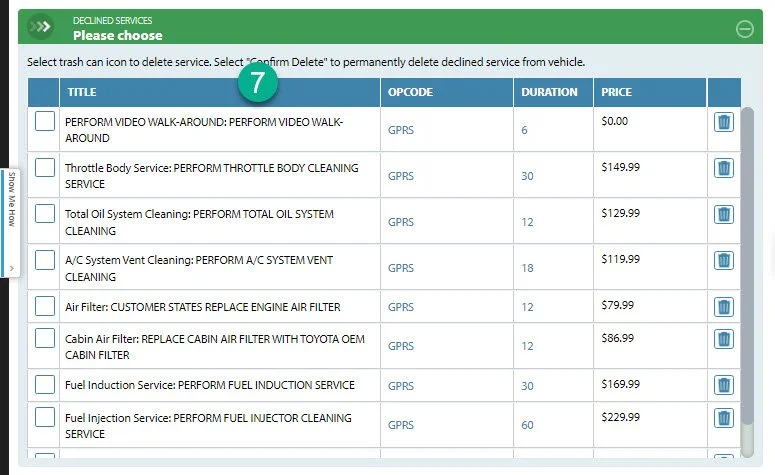
7- Offer any previous declined services for the customer.
This sounds like: “Looks like the last time you were in; your advisor had recommended some additional work for your vehicle. Did you want to have any of those scheduled as well?”
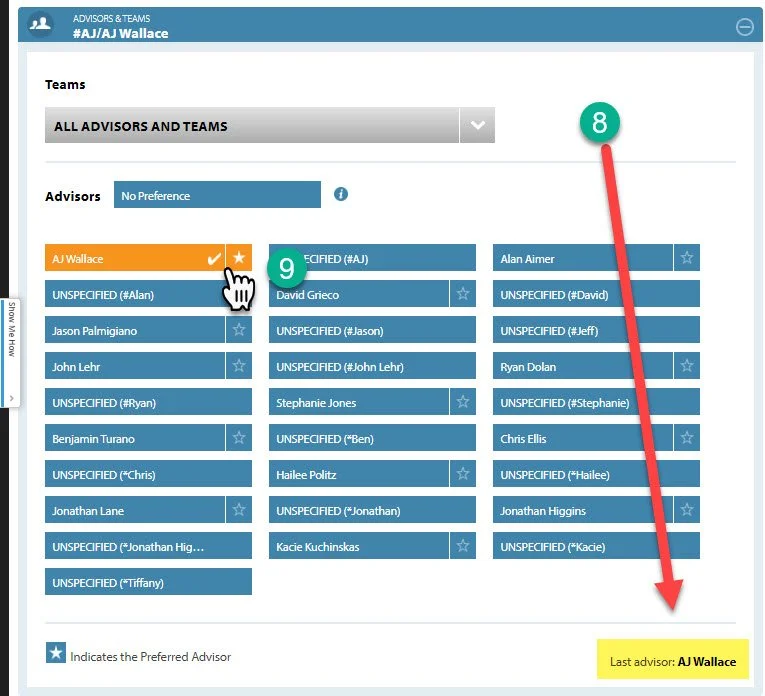
8- Choose the advisor based off the customer’s last visit. Check the bottom corner of this tab to see the customer’s last service advisor.
9- Check off the Advisor’s name and click the star to set the advisor as default.
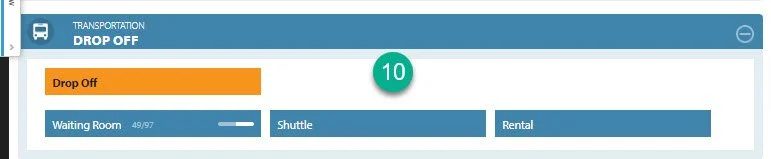
10- Choose a transportation type:
Drop Off- The customer will be dropping the vehicle off for the day.
Waiting Room- The customer will be waiting with the vehicle
Shuttle- The customer requested to drop the vehicle off but will need transportation elsewhere.
Click here for a link to the Shuttle Guide
Rental- The customer requested a rental vehicle.
Click here for the rental guidelines and procedures. (link)
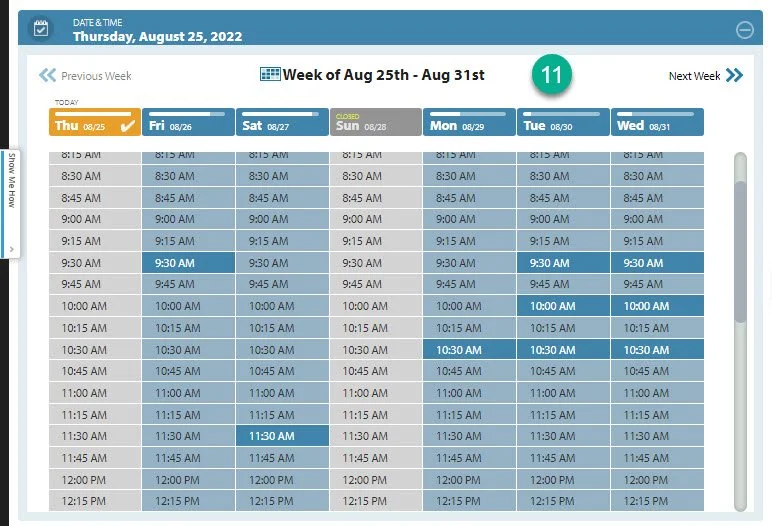
11- Select a time for the appointment. The dark blue times are available, the gray blue times are unavailable based on the advisor schedule.
** Always offer two times. This sounds like “Would Friday at 9:30 or Saturday at 11:30 work better for you?” **
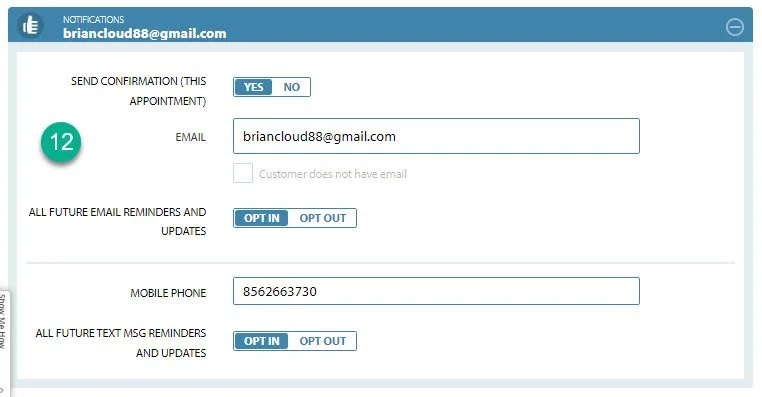
12- Opt the customer into communications.
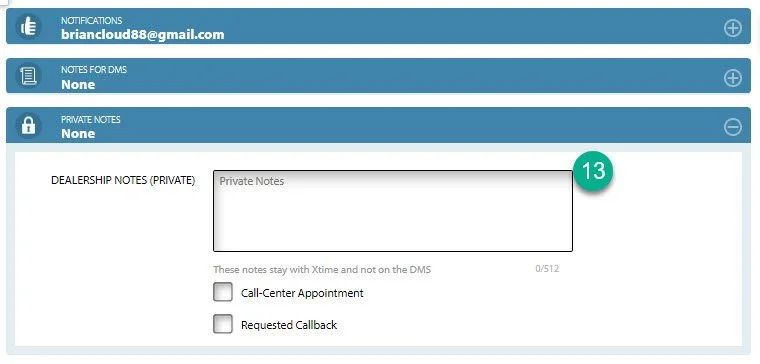
13- Use the “Private Notes” section to leave any notes for the advisor, such as a parts order number, or customer descriptions of the issue.
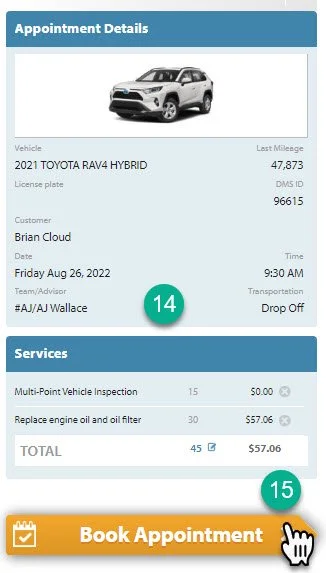
14- Review the appointment with the customer.
This sounds like: “Ok Mr. Cloud, you’re all set for Friday August 26th at 9:30 to drop your vehicle off with us for an oil change and a multipoint inspection. When you get here, just pull up to our service booth and our greeter will direct you over to AJ. Please be sure to arrive as close to 9:30 as you can so we can get you in and out as fast as possible.”
15- Click “Book Appointment”