
Appointment Log
There are two ways to navigate to the Appointment Log
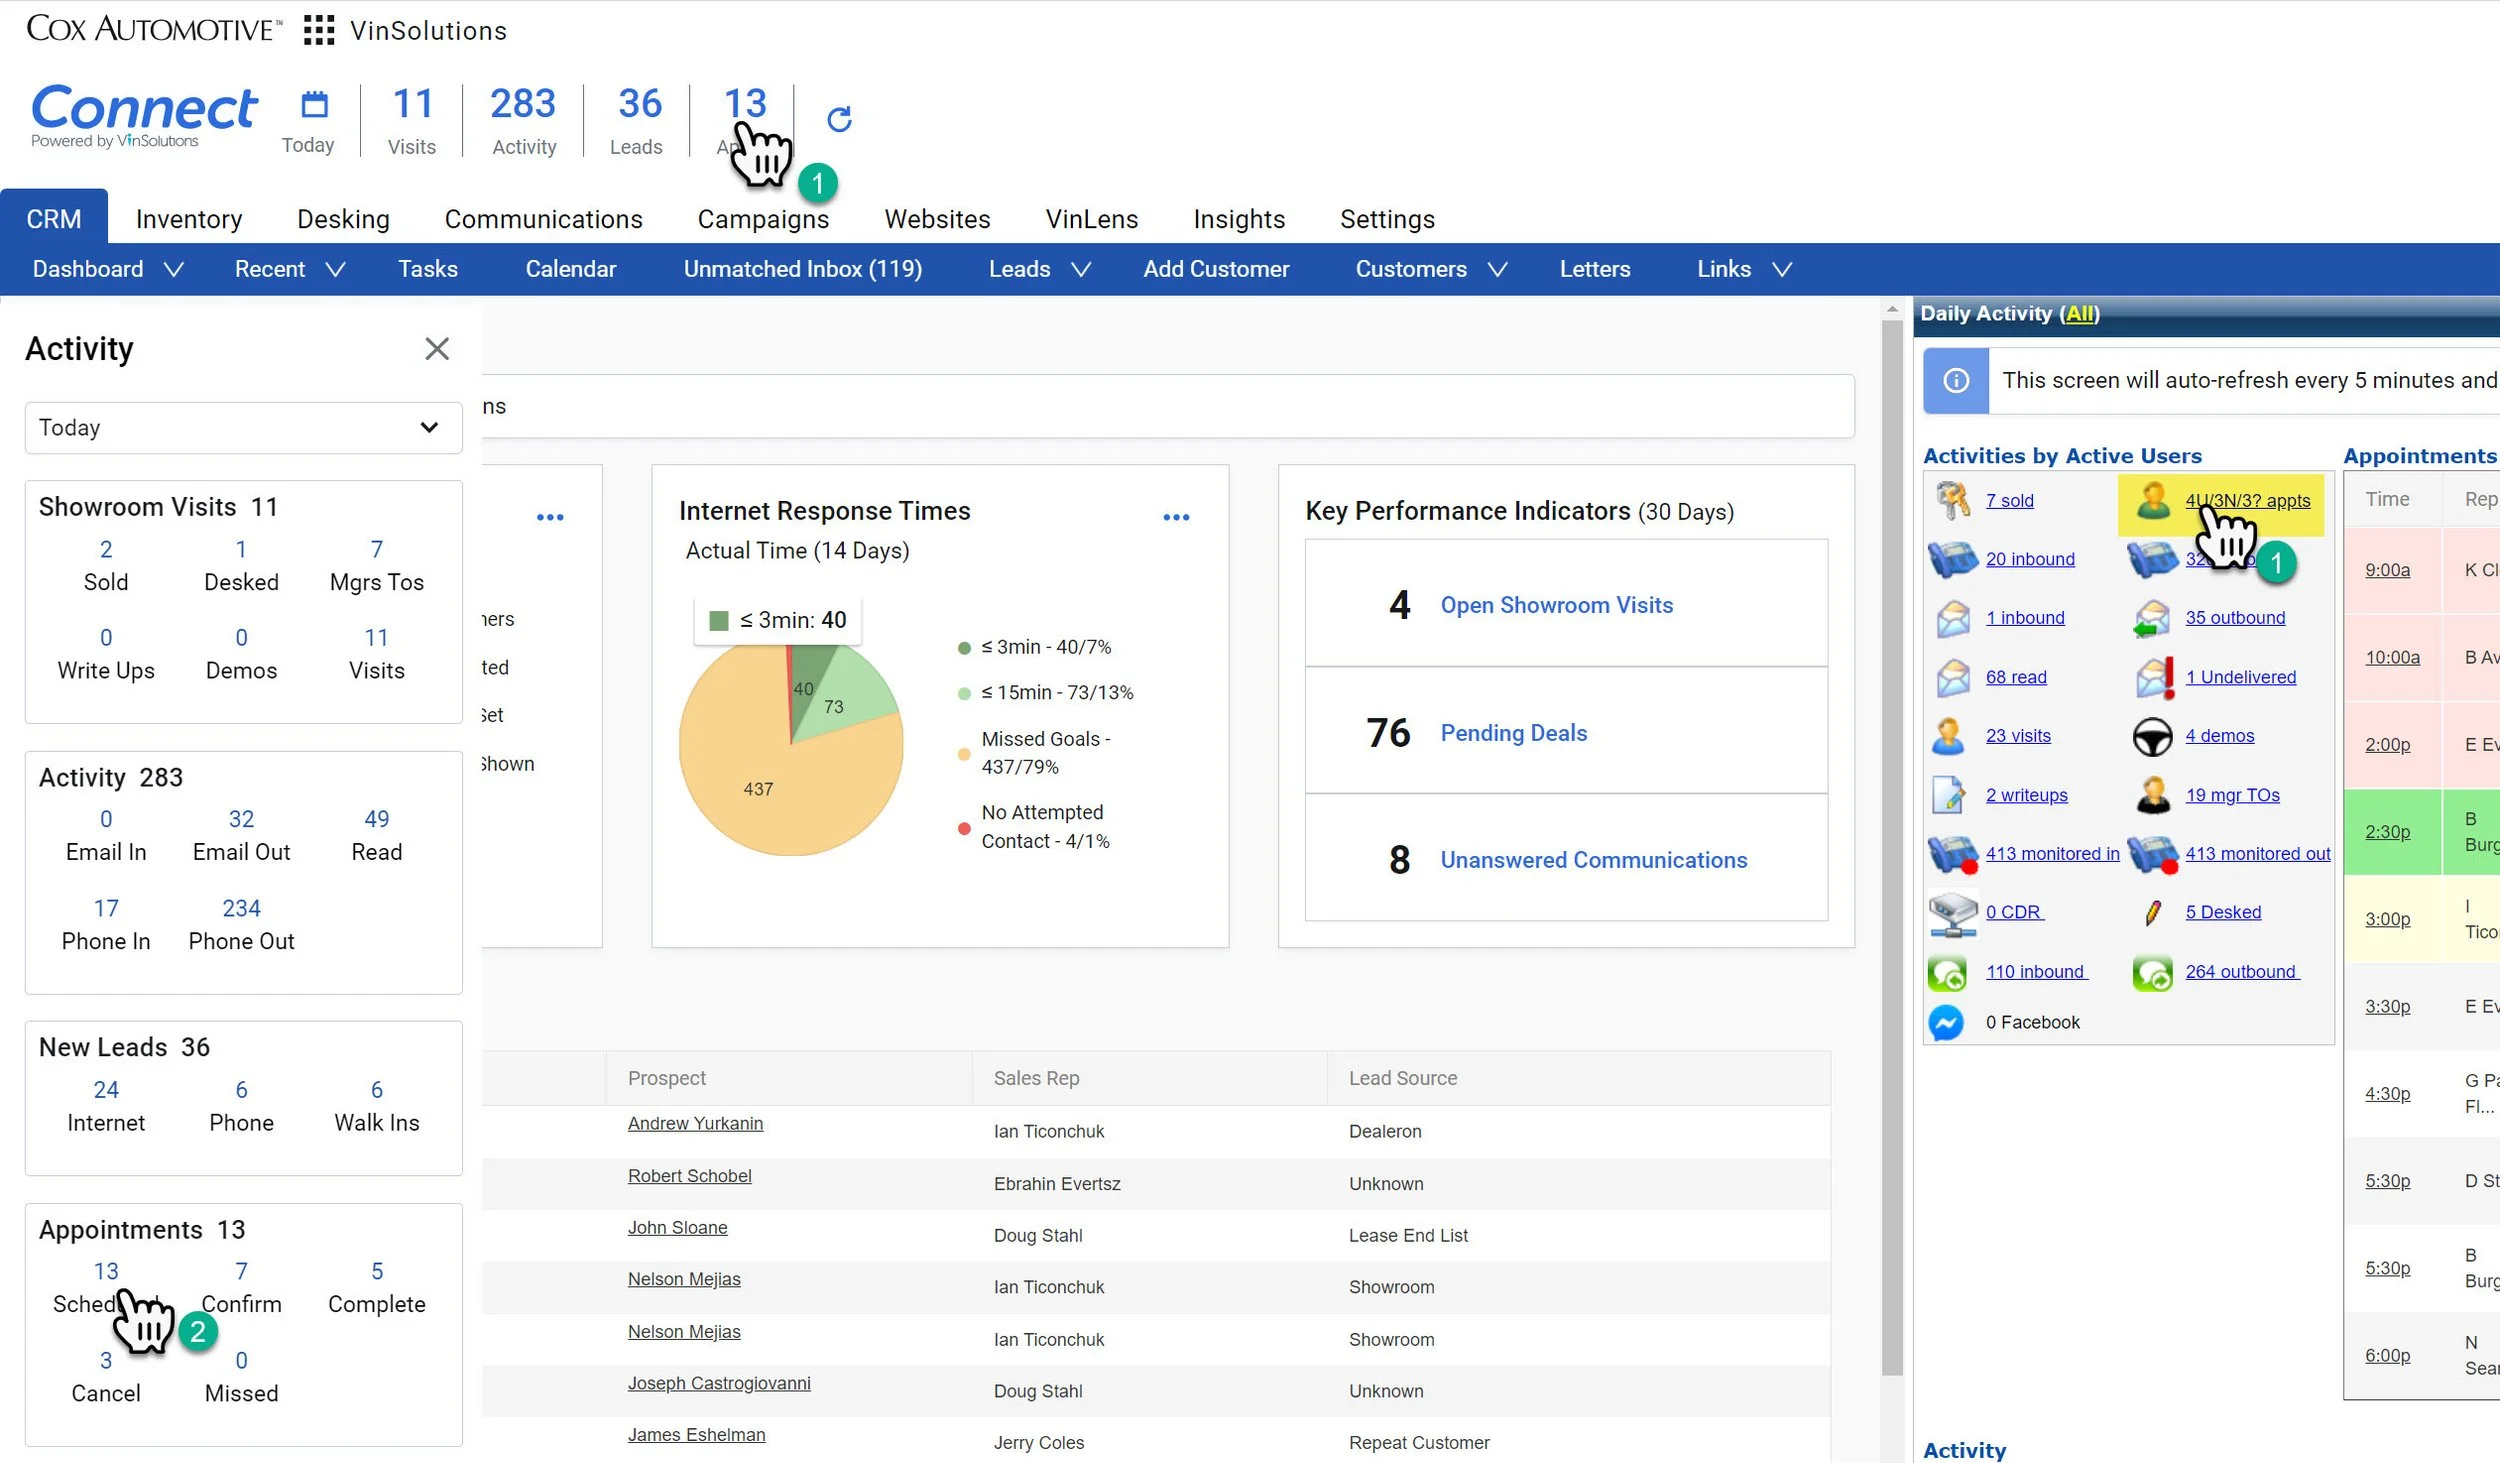
1- You can click on the numbers next to the silhouette under the Activities by Users Section where it says “appts”
-OR-
1- Click on the Connect Dashboard
2- Click on any of the numbers in the “Appointments” Section
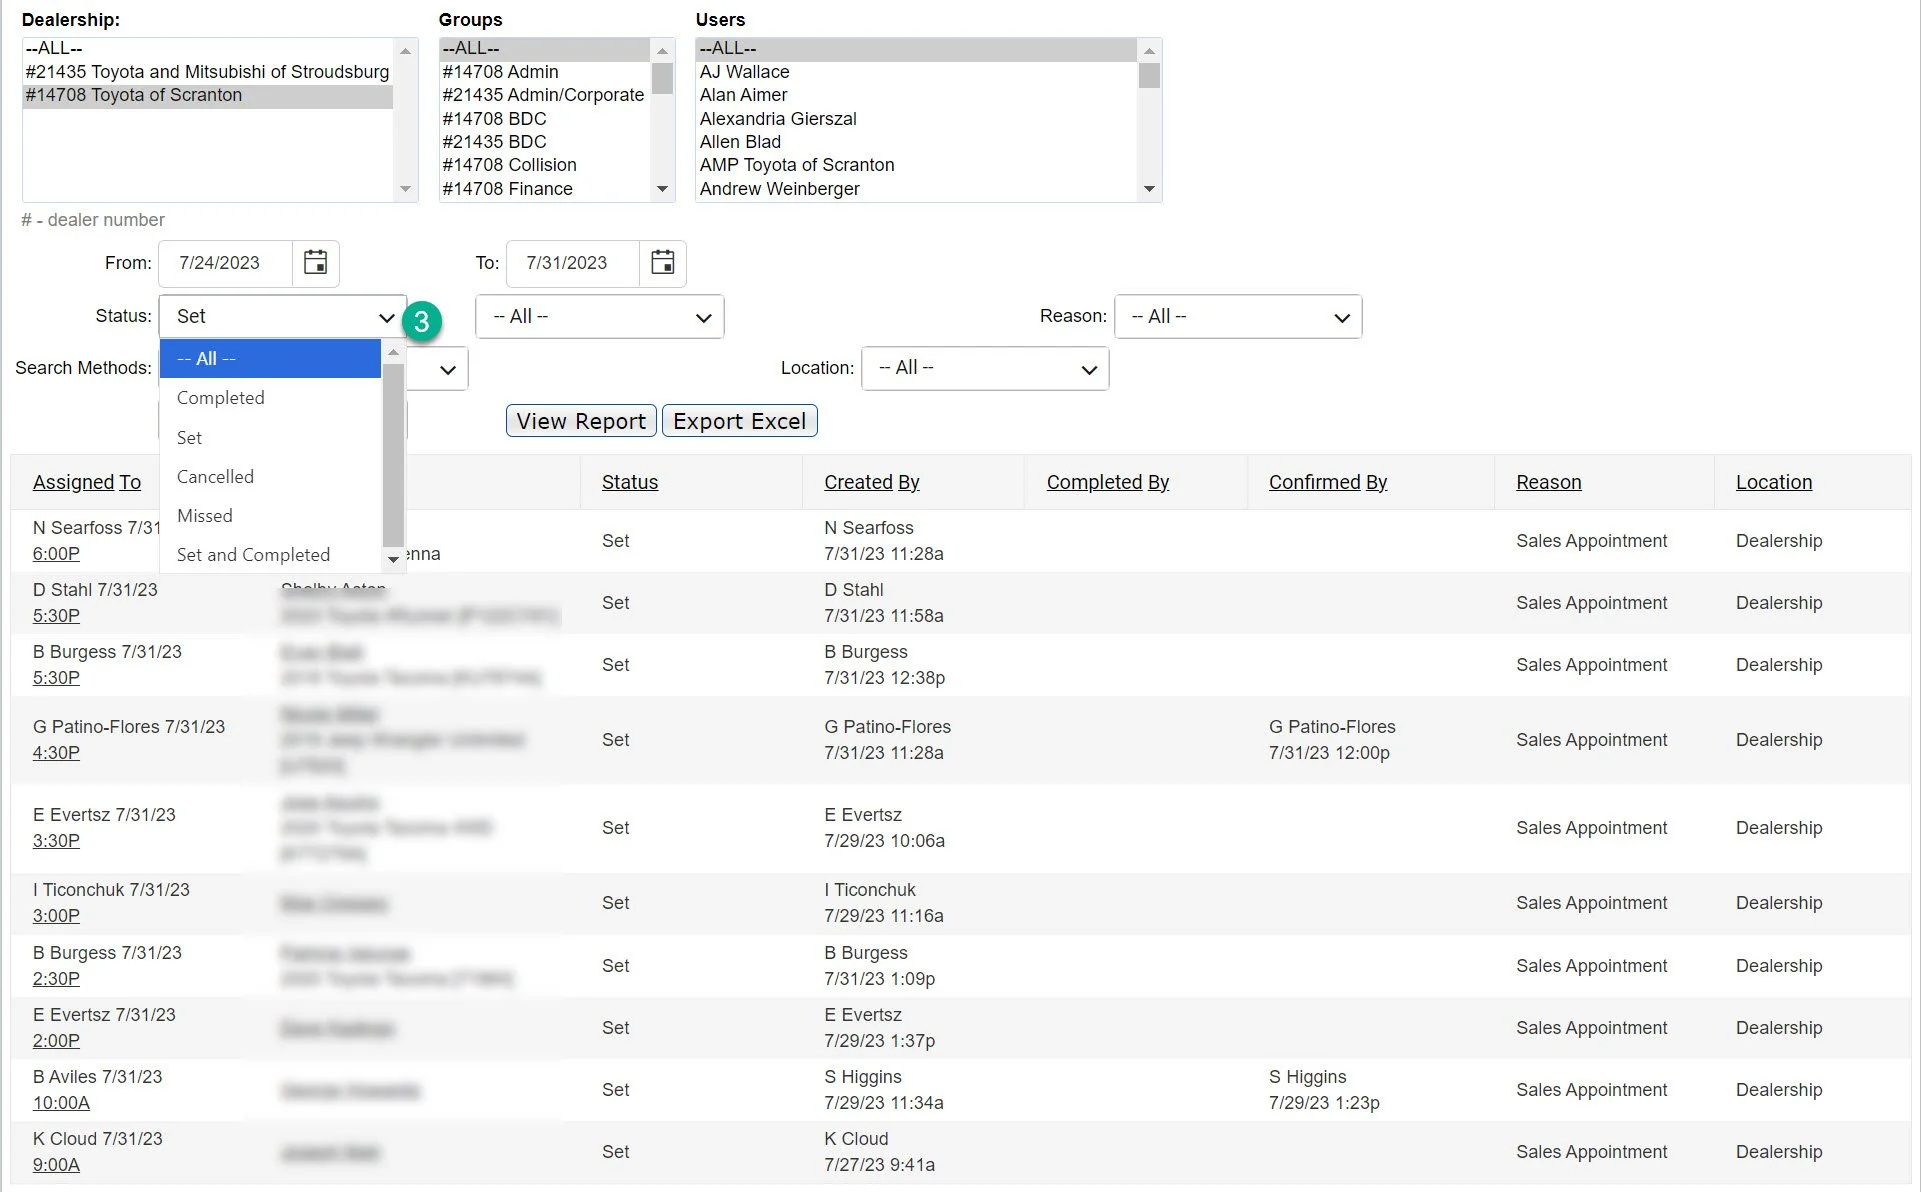
3- Confirm the type of Status you are looking for.
You almost always want to look at “—All —”, unless you are looking to focus on a particular appointment type.
Status Definitions:
Completed- This customer arrived for their appointment.
Set- This appointment was set, but no further action has taken place.
Cancelled- This means the appointment was a mistake. If the customer set and appointment and did not show, mark it missed. If they cancelled prior to the appointment, mark it missed. Cancel is only reserved for mistakes. It will reflect as if no appointment was scheduled in reporting.
Missed- This customer missed the appointment.
Set and Completed- The customers set an appointment and showed up for it.
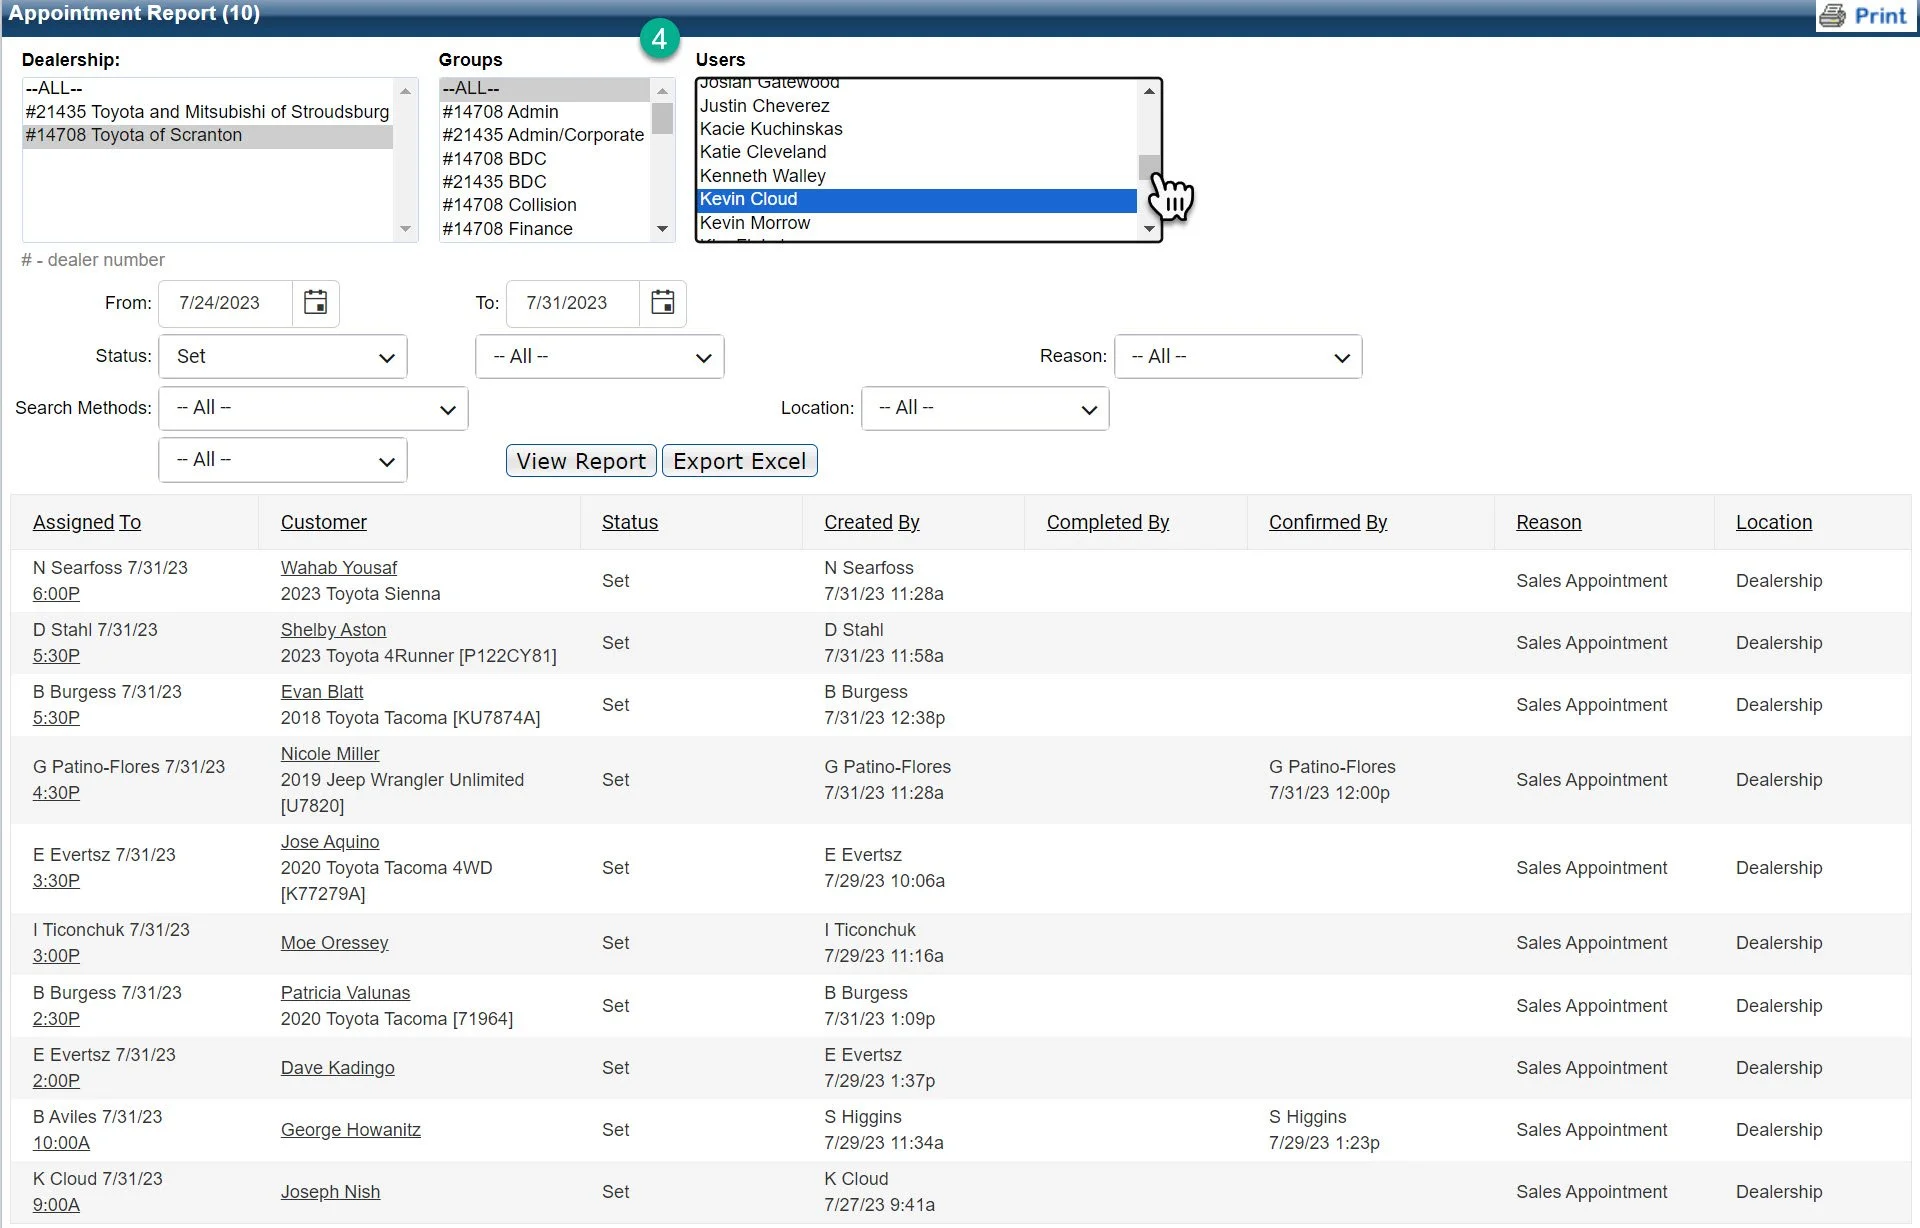
4- Confirm the user you are looking for using the drop down.
Salespeople almost always want to look at their own name. Managers are going to want to look at the entire group as well as be able to narrow down to individual users.
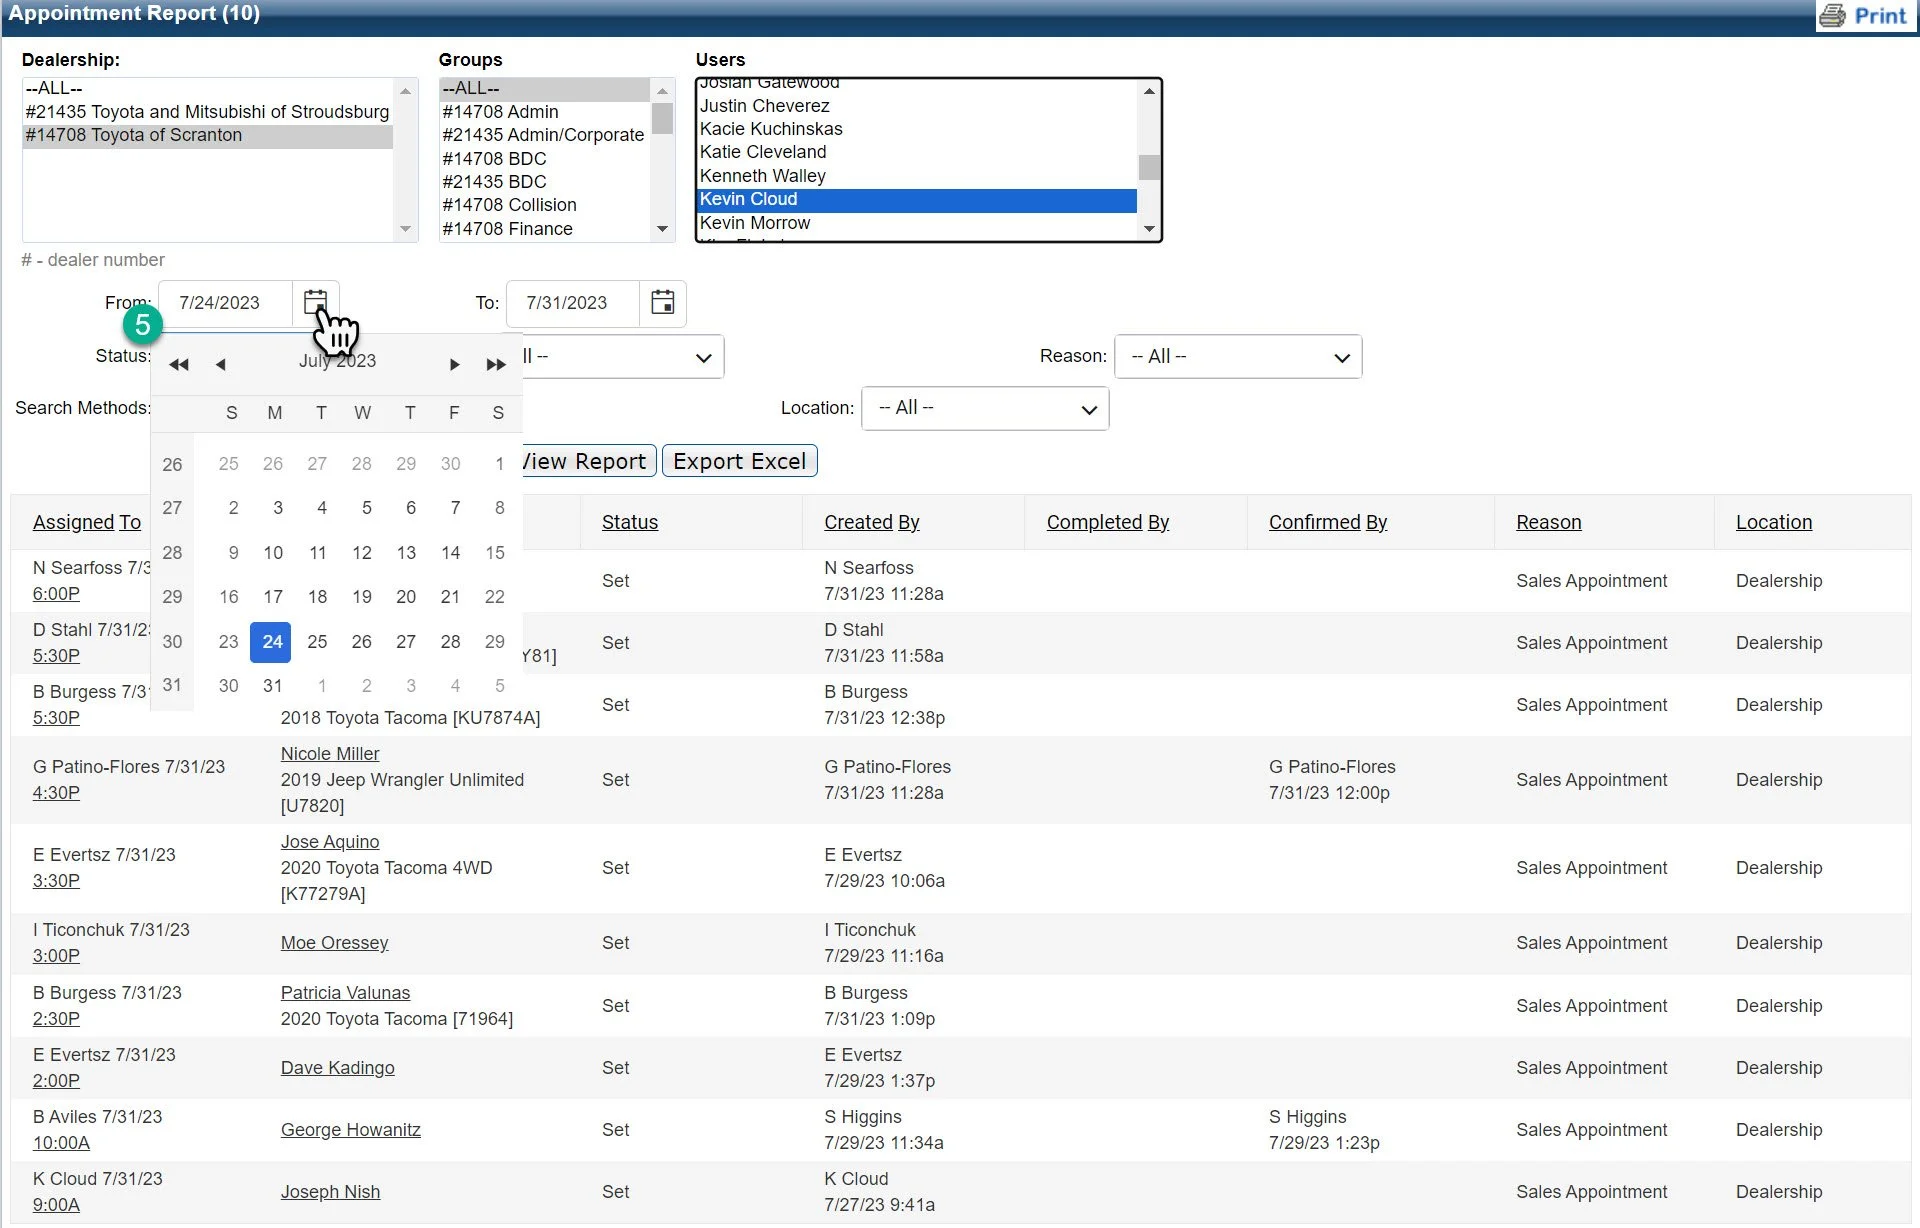
5- Confirm the date ranges you are looking for by using the calendar drop down.
Make sure you adjust the “From” and “To:” sections to select the appropriate dates. Common time frame are also available by clicking the links below.
Our main focus will be on the time frame will be the Last 7 days.
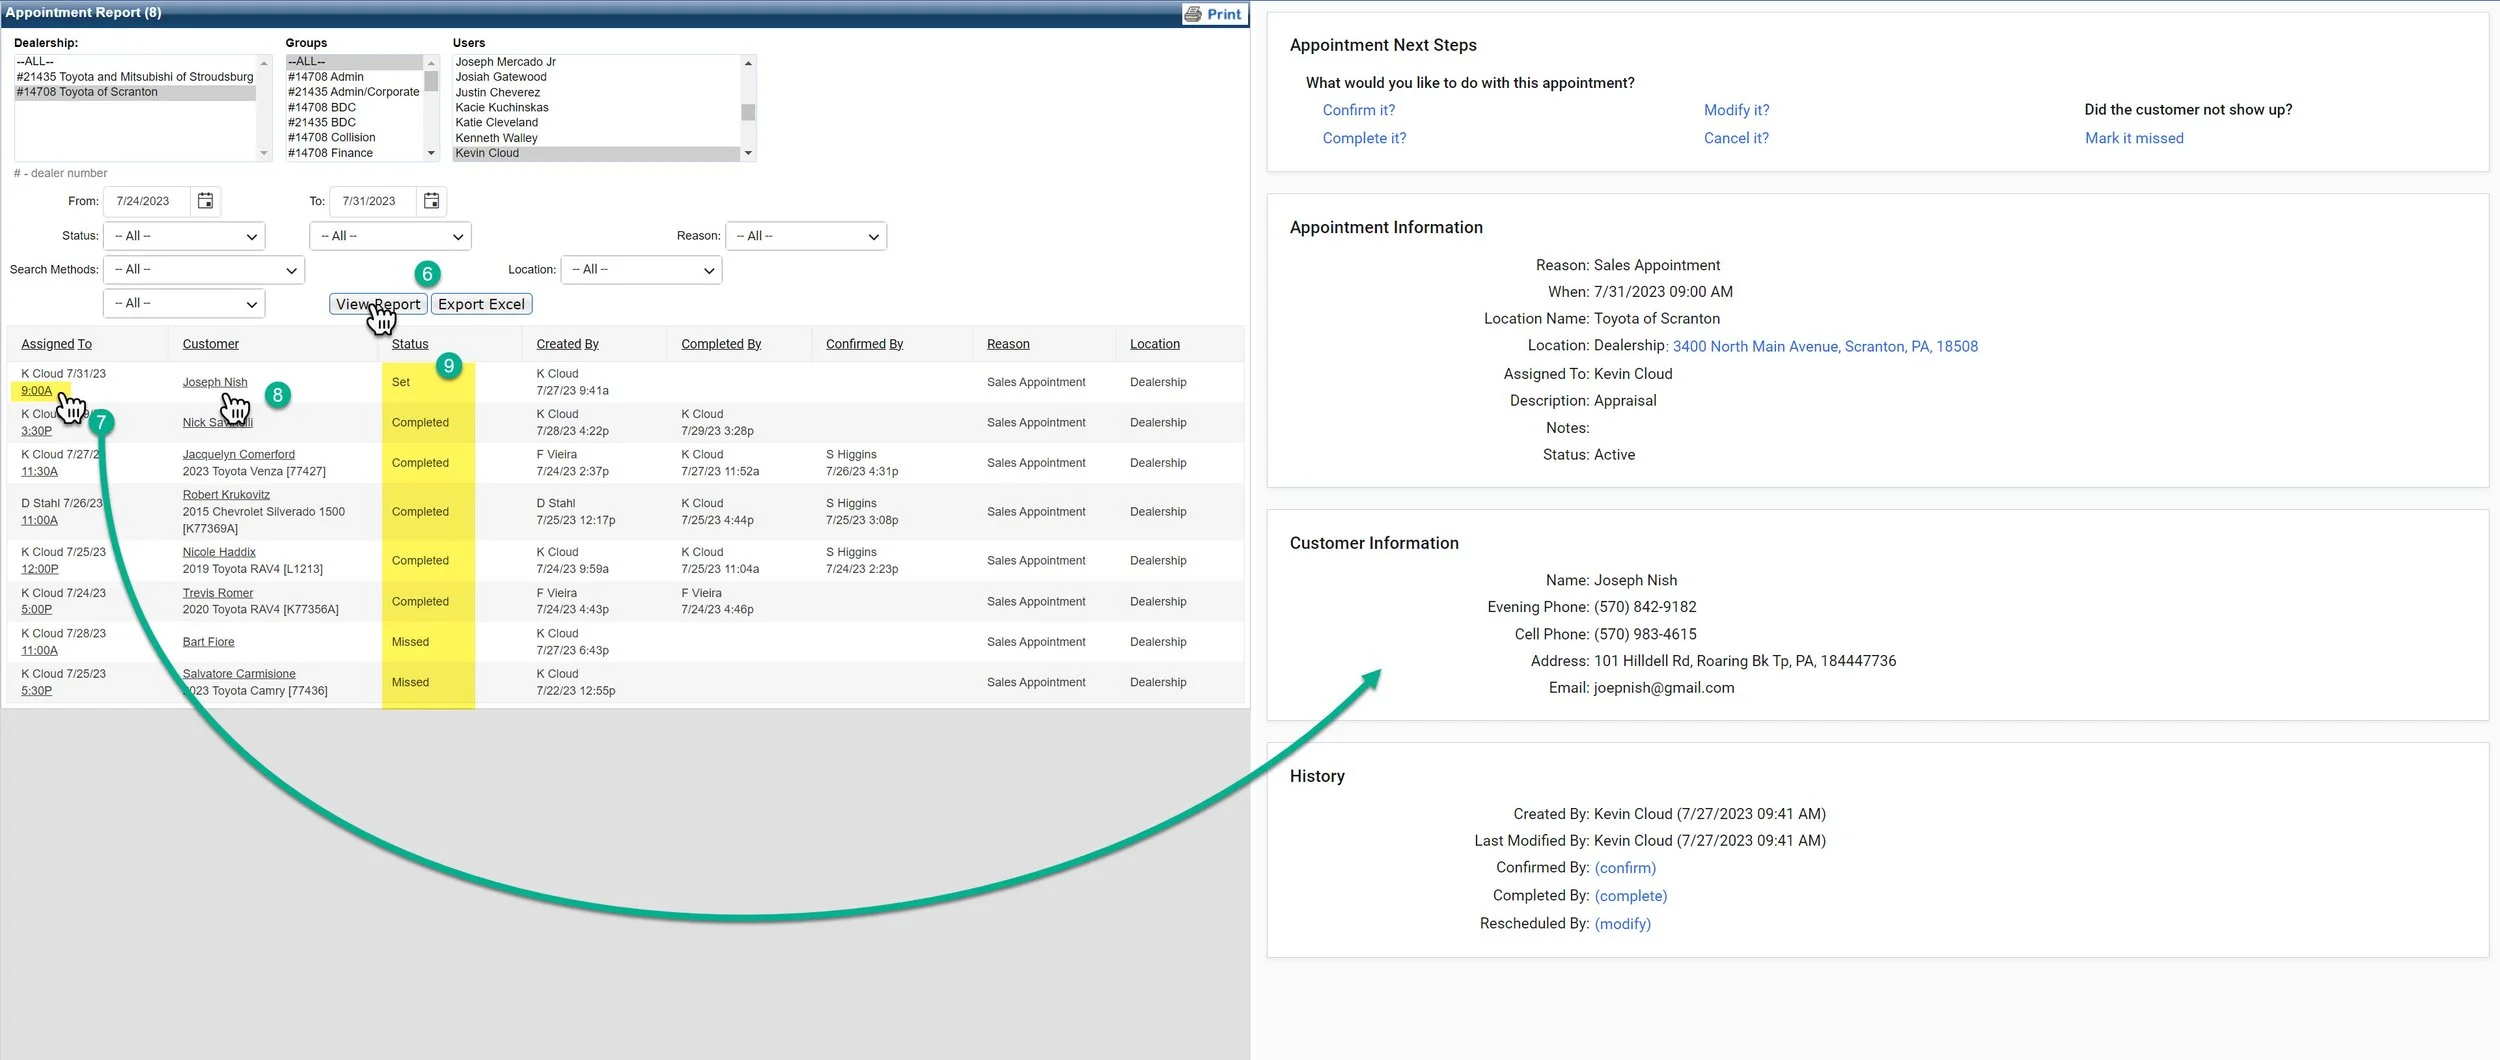
6- Once you have double checked your log settings. Click “View Report” to update the log.
7- Click on the time under the salesperson’s name to open up the appointment next steps screen to make any quick adjustments.
This is helpful for updating missed appointments at the end of the day.
8- Click on the Customer Name to open the customer profile
9- Review the Status if you have sorted by all to make sure you have taken the appropriate actions.