
Contact Confirmation Email
It's Day 3, and this is the final manual email you'll need to send before the automated process takes over.
The initial email didn't get a response, and even changing the subject line didn't work. Now, we're going to ensure we're reaching the right person and provide some helpful insight to engage the customer.
Follow these steps to proceed:
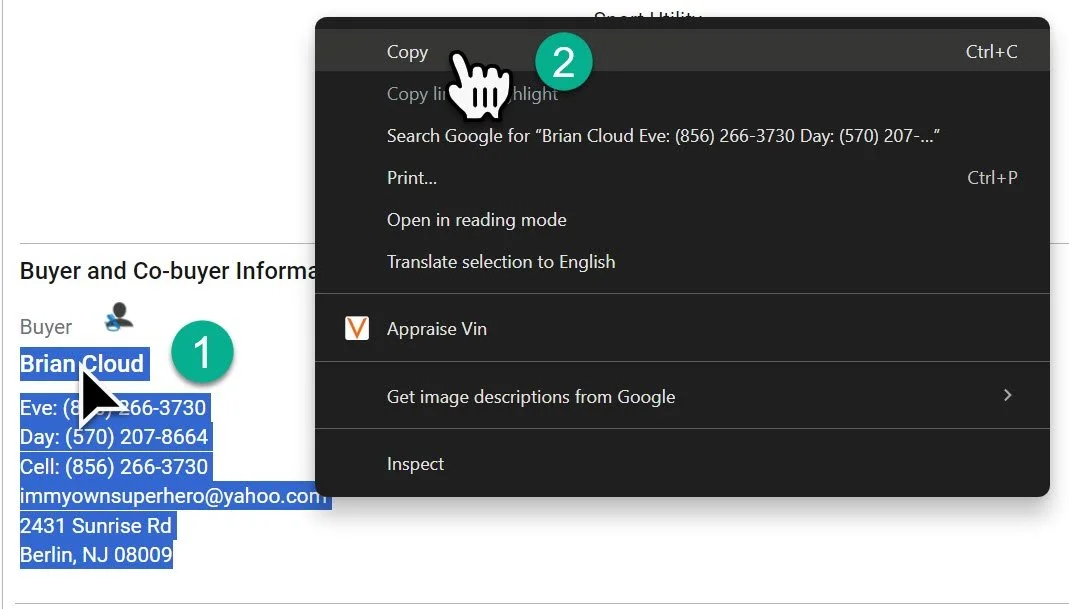
1- Locate the customer’s information in the Buyer and Co-buyer information section of the Customer Profile and highlight the customer’s email.
This section allows for easy copying without opening a new screen.
2- Right-click on the highlighted email and select “Copy.”
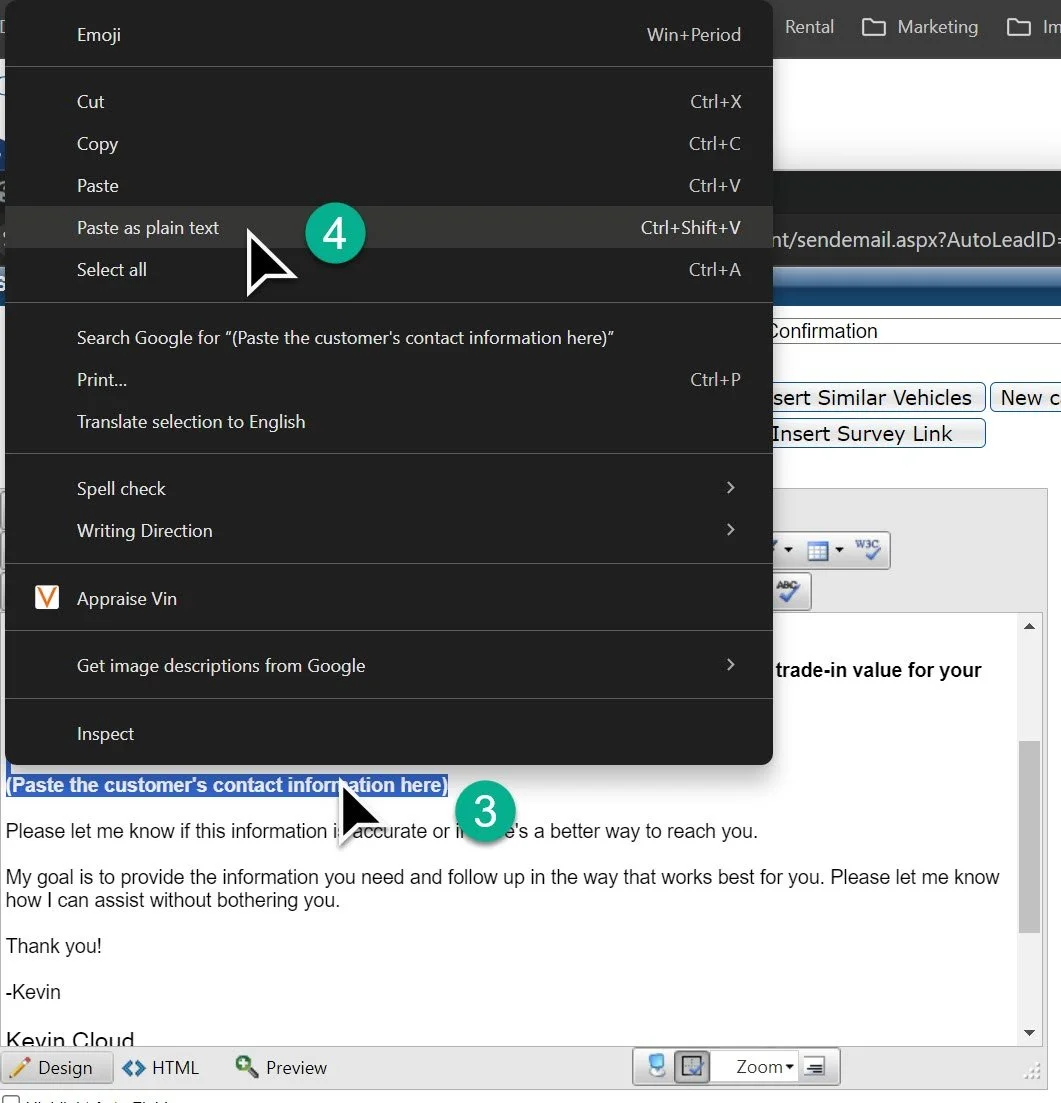
Open the email templates and select "!Day 3 Contact Information Confirmation."
3- Locate the section that instructs you to paste the customer contact information.
4- Highlight the designated area, right-click, and select "Paste as plain text."
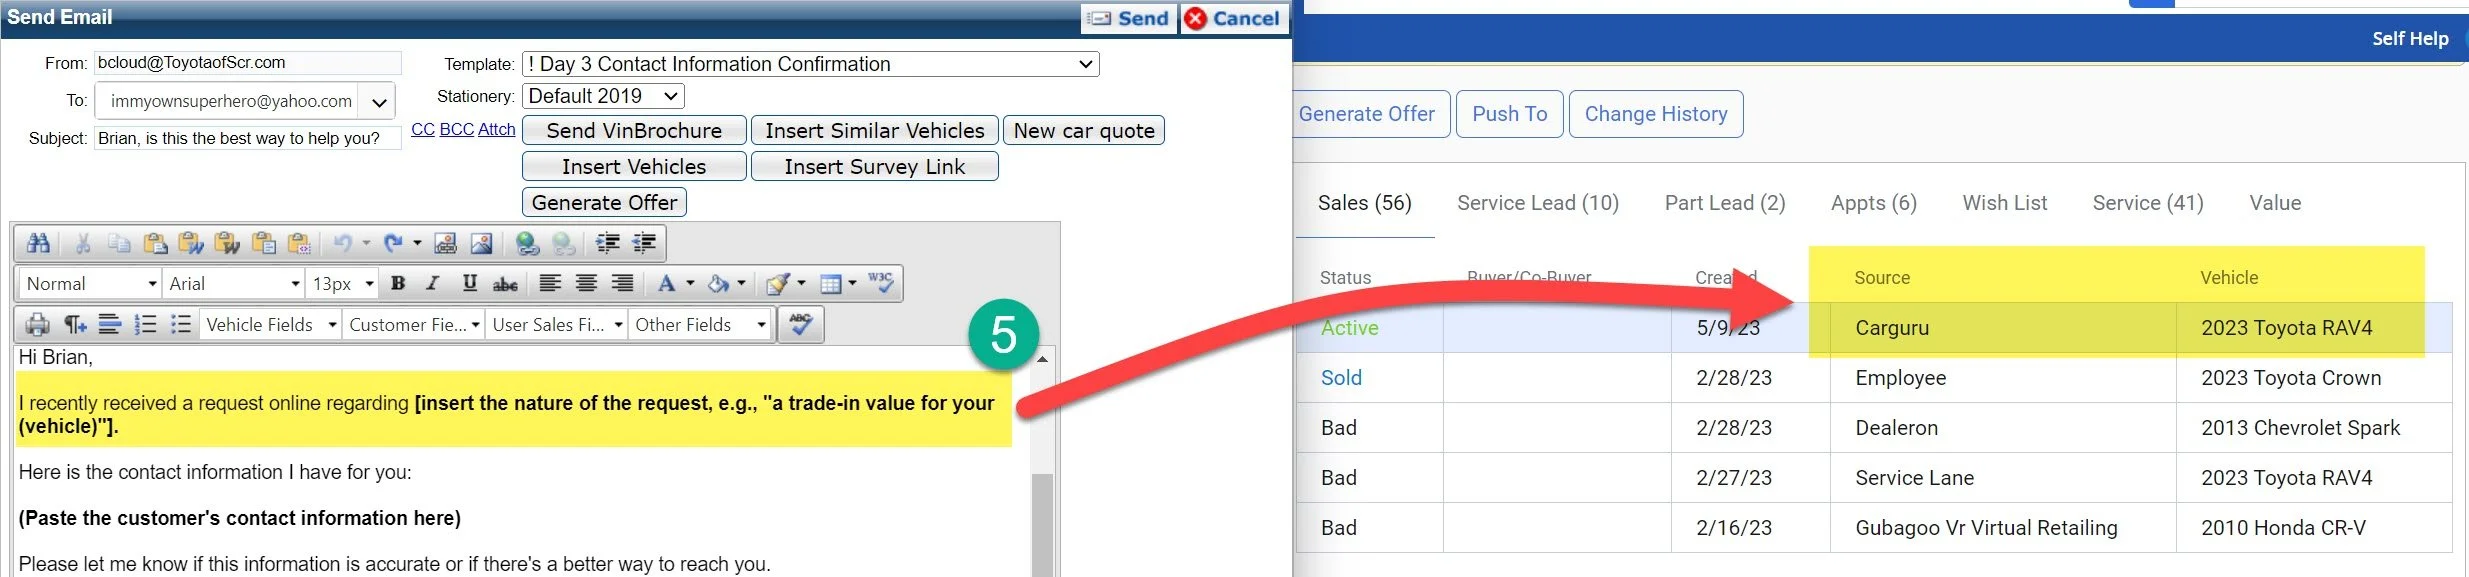
5- Replace the first sentence of the email with text that corresponds to the specific lead you received. If you need assistance, refer to the Lead Source Guide.
For example, change the sentence from "I recently received a request online, regarding..." to something like, "I recently received a request from Cargurus about the 2023 RAV4."
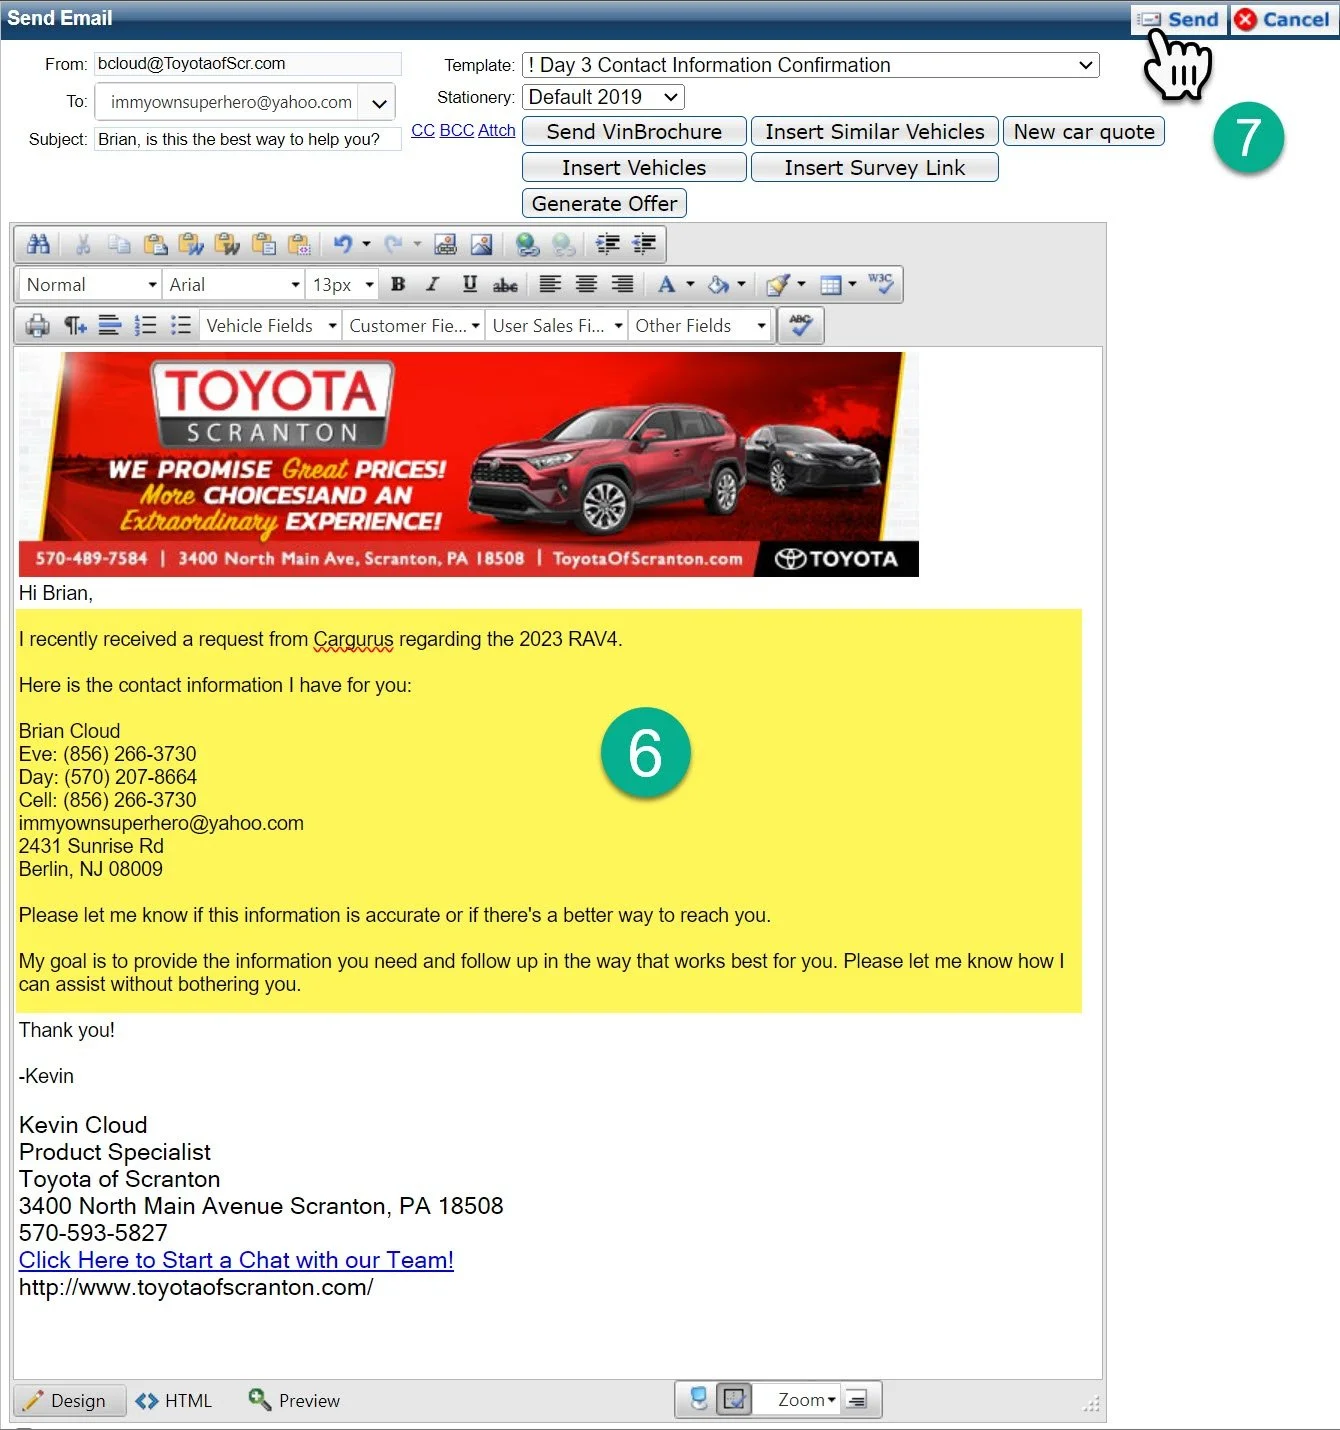
6- Review the email to ensure consistency in font, size, and formatting. Make sure nothing is bold or out of format. Double-check that the customer information and any sentences you've added are clear and free of typos.
7- Click “Send” to send the email.