
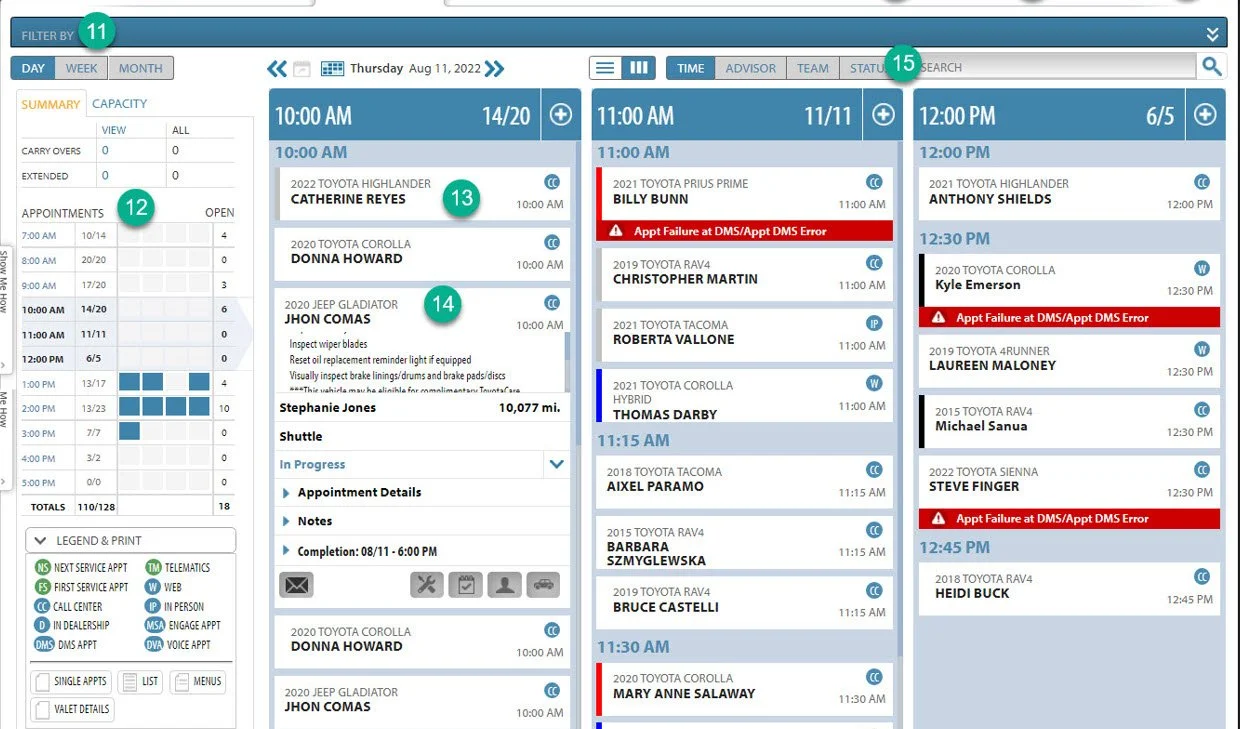
Workbook View
This is the command center, where you can view all the appointments and the customer appointment cards, including time, status, and vehicle.
You can also quickly leave internal notes. You will spend much of your time with this screen open.
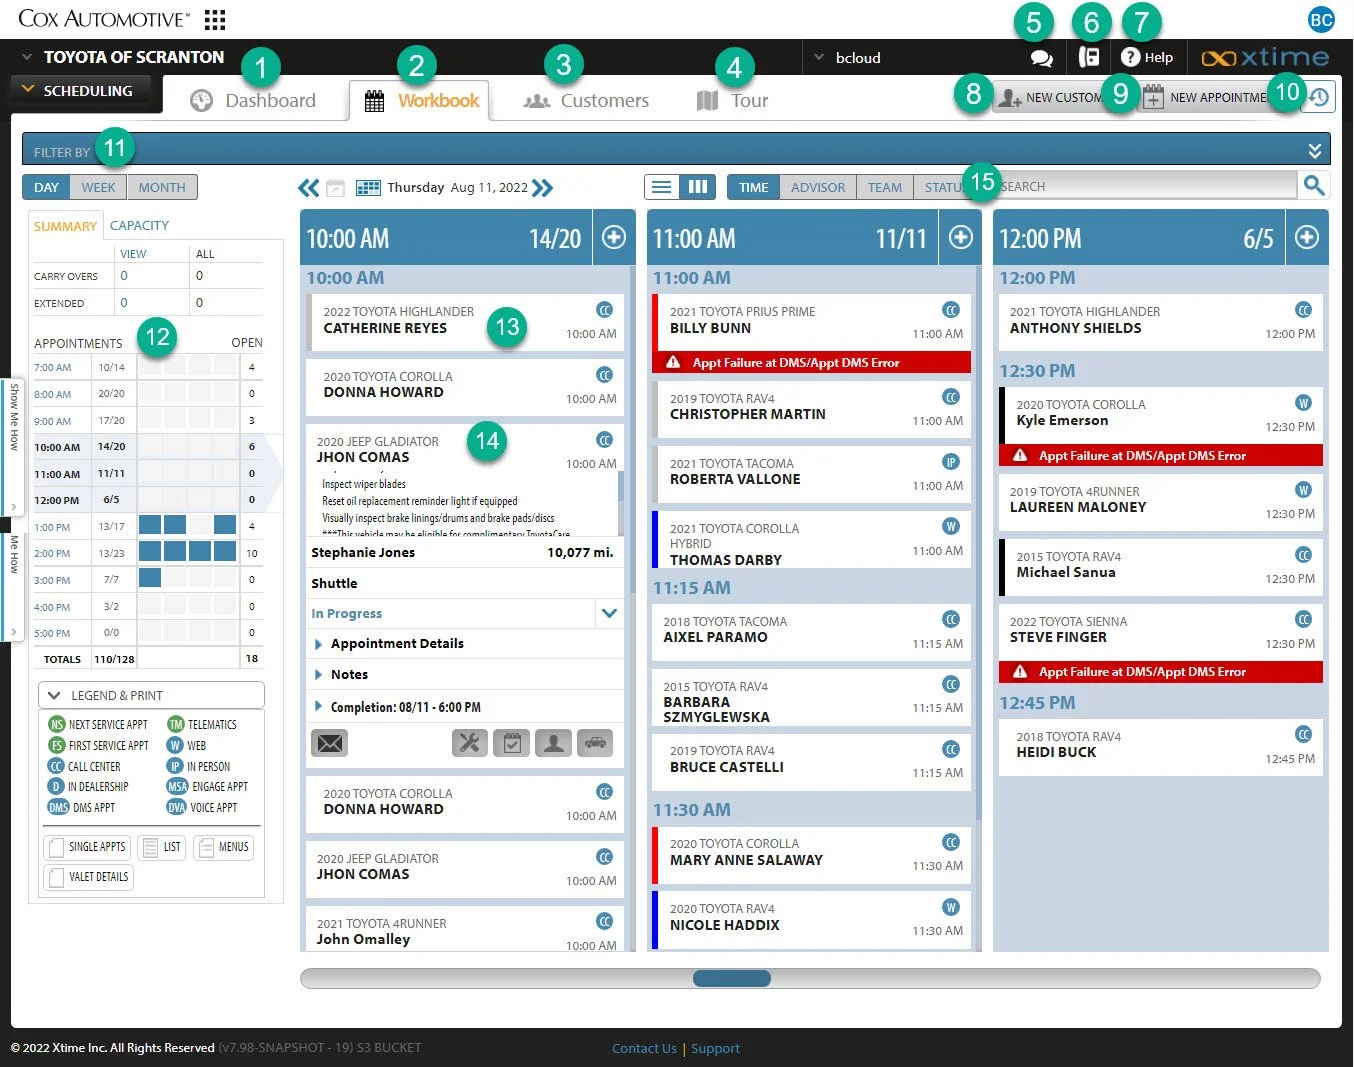
1- Dashboard Button: This is a visual representation of your day, showing the busiest times and opportunities for additional appointments
2- Workbook Button: This is your operations command center where you can see the status of your customers and their vehicles
3- Customers Button: This is the customer search function. Here you can search by name, phone, VIN, or license plate.
4- Tour: You can find most of what you need to know on how to work Xtime here. Some of the above has been copied directly out of that Tour Guide.
5- Messages: This is the message center for the dealership.
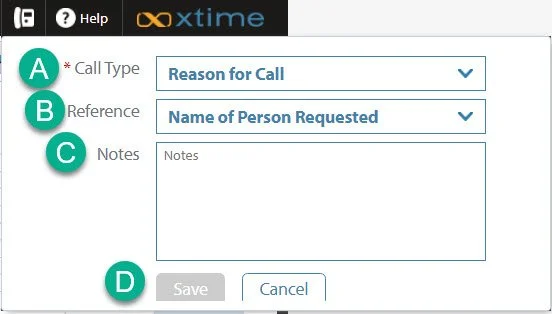
6- Phone Log: This is where you can log a call you’ve made to a customer. We do not use this function here at the dealership.
It does not log specific to a customer and leave information behind on a profile.
a. In this drop down you can select the reason for your call.
b. In this section you can select who the customer was calling for.
c. In this section you leave the notes regarding your phone call.
d. Click the “Save” button to complete the logging of the phone call.
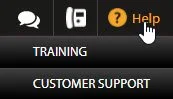
7- Help: From here you can access Xtime University to take video training classes and tests or reach out to customer support.
8- New Customer: Add a new customer and their vehicle to the system.
Click here for a guide on how to add a new customer.
9- New Appointment: Quickly adding a new appointment directly from the dashboard.
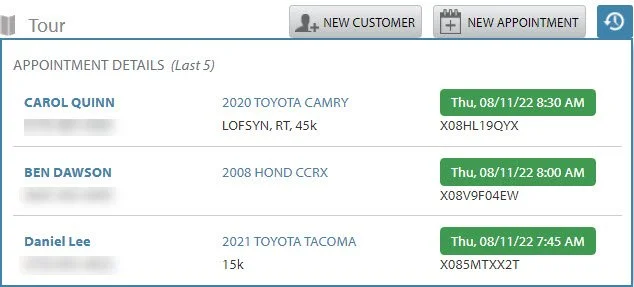
10- Recent Customers: By clicking this button you can find the customers you have recently viewed.
It will pop in the corner of your screen. Click on the customer’s name to return to their profile.
Make sure you click apply for your filters to take effect.
12- Capacity: View daily appointment capacity by advisor, team, or shop.
13- Scheduled Customer: This is the name of the customer, including year, make, model, and color of the vehicle (this is the color bar to the left of the name).
By clicking on the customer, you open the appointment card.
14- Appointment Card: From the appointment card you can view the customers name and contact information, transportation type, mileage, advisor, appointment source, status. (Link Out)
15- Search: this searches Today’s appointments.
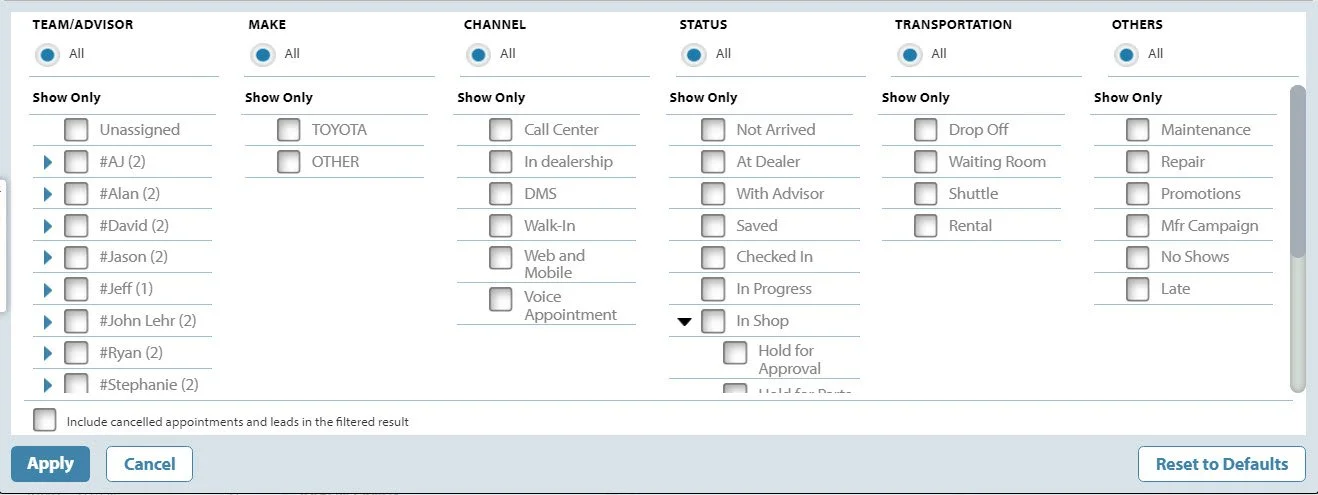
11- Filter: Organize the workbook by advisor, appointment source, status, transportation, and service type. The filter option will look like this: